Post Contents [hide]
- What is a Shower Enclosure?
- Common Types of Shower Enclosures
- Essential Guidelines Before Installation
-
How to Install a Shower Enclosure: A Step-by-Step Guide
- Phase 1: Installing the Shower Tray
- A. Installing the Shower Tray Without a Riser Kit
- B. Installing a Riser Kit on the Shower Tray
-
Phase 2: Installing the Shower Enclosure
- Tools & Materials You'll Need
- Step I: Install Vertical Wall Profiles (Brackets):
- Step II: Drill and Insert Wall Plugs
- Step III: Assemble the Frame
- Step IV: Install the Glass Panels
- Step V: Adapt the Sliding or Hinged Doors
- Step VI: Attach Handles and Covers
- Step VII: Apply Door Seals
- Step VIII: Corrected the Wall Profiles of the Enclosure
- Step IX: Seal the Exterior Only
- Professional Installation — When You Need It
- Conclusion
- Frequently Asked Questions
A well-fitted shower enclosure is more about aesthetics, functionality, style, and a new level of comfort in your space. Installing a shower enclosure might be a complex task when restyling your bathroom or upgrading an old one, but with the proper instructions and guidelines, it's simpler than you might think.
In this guide, we take you through everything, from understanding what shower enclosures are to the different types and the complete installation process. Let’s begin with the basics.
What is a Shower Enclosure?
A shower enclosure is a specific showering area surrounded by glass panels that contains water in one particular area. It comprises splash prevention, increased privacy and provides a clean, modern finish to your bathroom. Enclosures are available in all sizes, shapes and door styles to suit large and small bathrooms.
From the free-flowing space of a walk-in enclosure to the space-efficient cost of a quadrant design, a look suits every layout and taste. Most shower enclosures are made from toughened safety glass and are designed to be easy to clean, robust and suitable for everyday use.
Common Types of Shower Enclosures
The type of enclosure you choose is vital to maintaining the home office balance of space, functionality, and design. Here’s a breakdown of the most popular shower enclosure types on the market today:
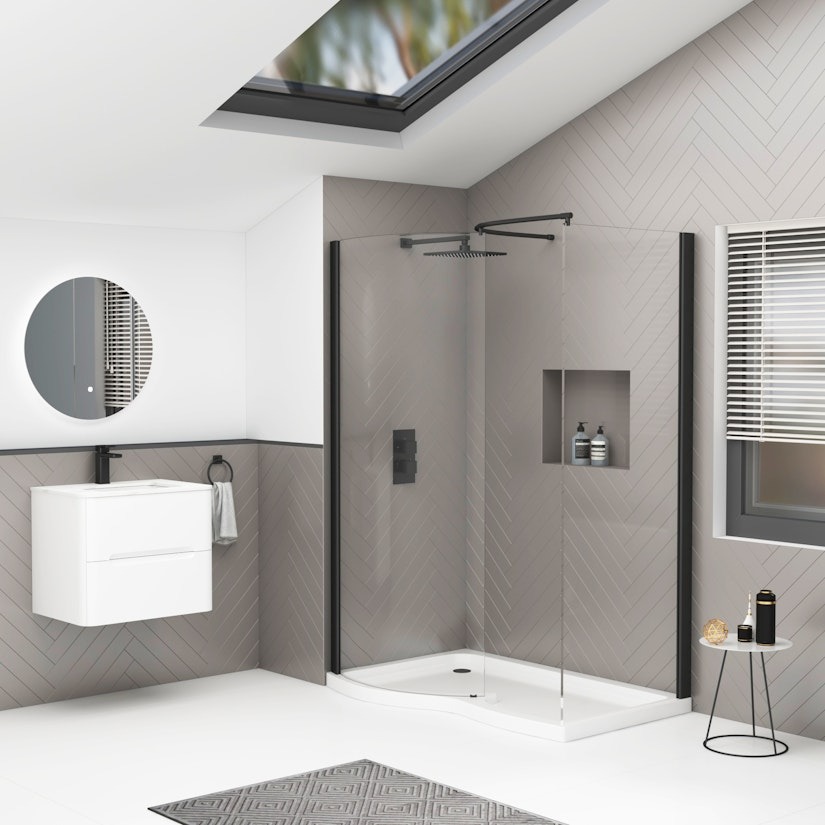
Walk-In Shower Enclosures
Minimal, open and seamlessly modern — walk-in enclosures are a favorite among contemporary bathrooms. Sometimes they have only one glass panel, and no doors, to allow easy, step-free access. Walk-ins also complement wet room floors beautifully and are perfect for achieving that spacious, hotel-like vibe. And for accessibility, their open layout makes them a practical option.
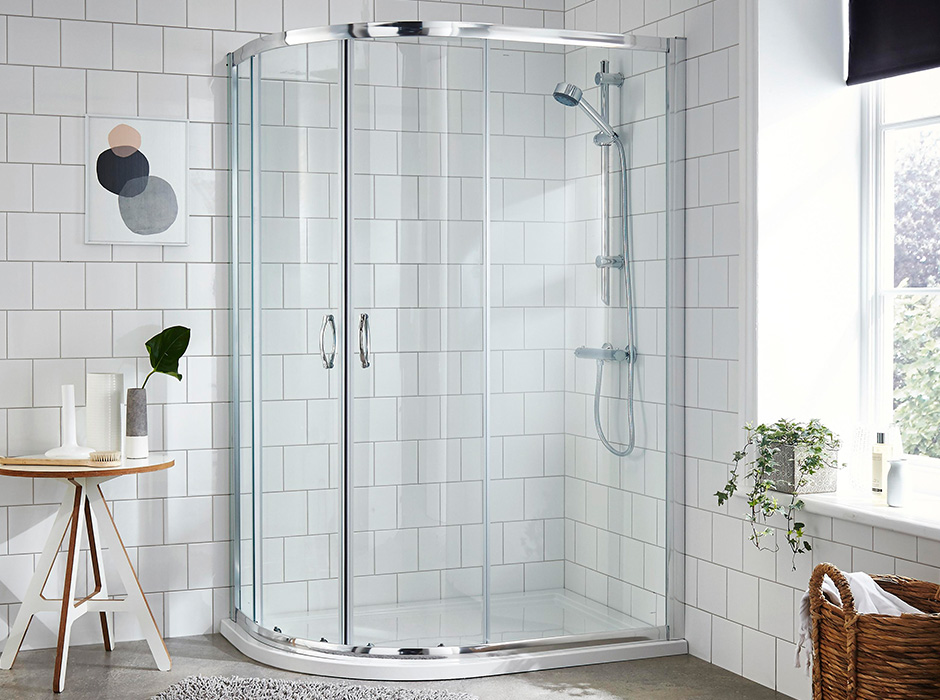
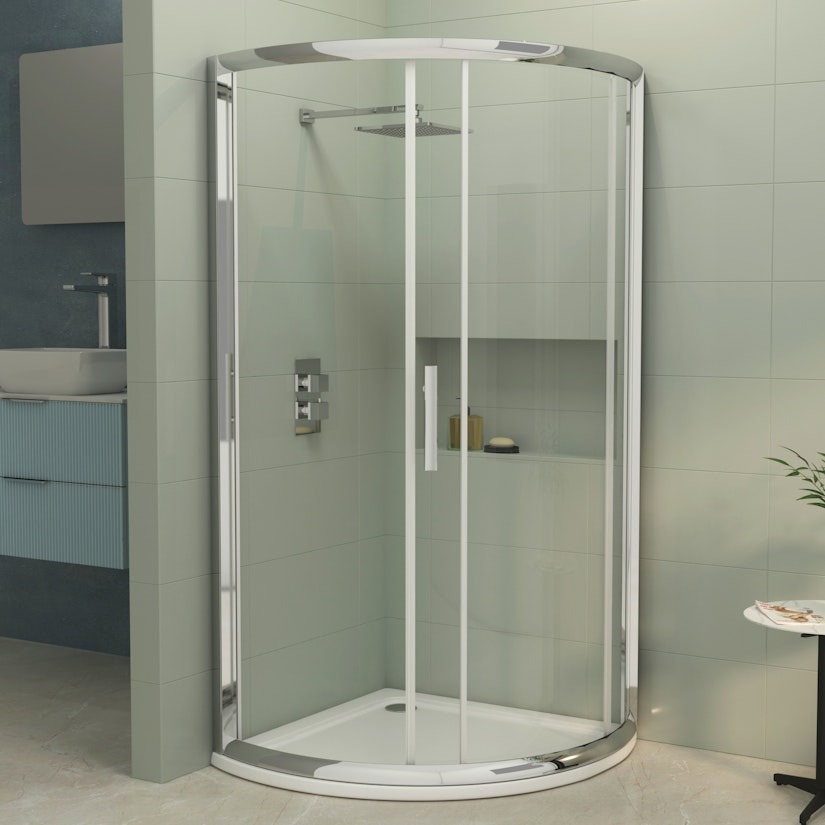
Quadrant Shower Enclosures
With curved glass fronts and set into a corner, these quadrant enclosures are great for bathrooms where space is limited. They provide plenty of space for comfortable showers and help maximise floor area. The sleek, rounded design smoothly integrates a touch of elegance and assists soft visual movement throughout tighter spaces.
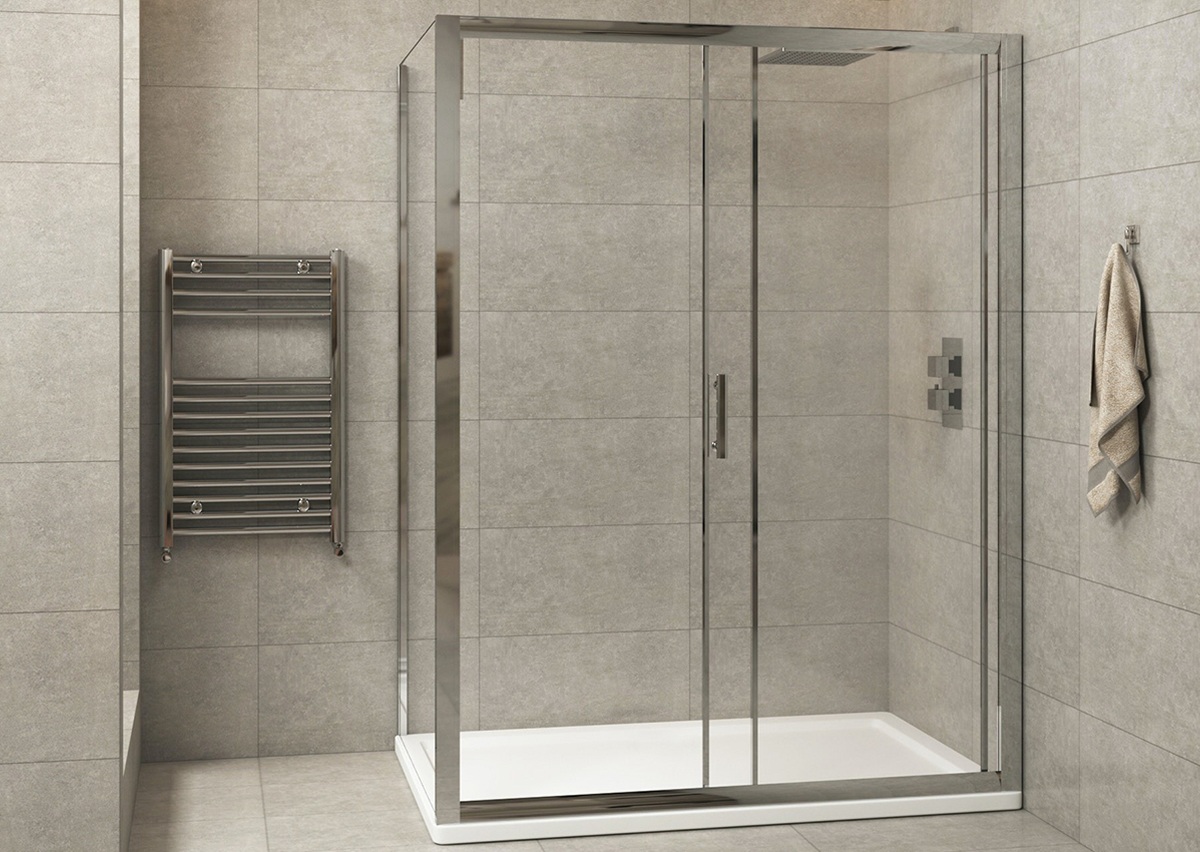
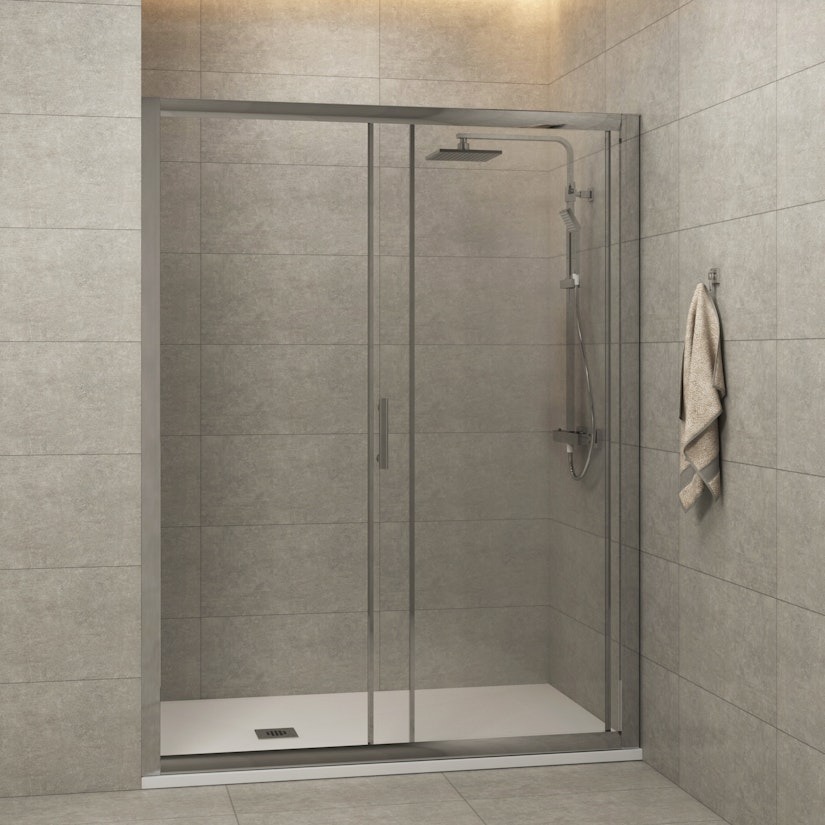
Sliding Door Enclosures
Modern and space-efficient, sliding door enclosures have glass panels that slide on tracks. Ideal for tight bathrooms where space is limited in front of the shower. They provide a wide entry without taking up additional room to open a door. Many models also have soft-close mechanisms, for a luxurious touch.
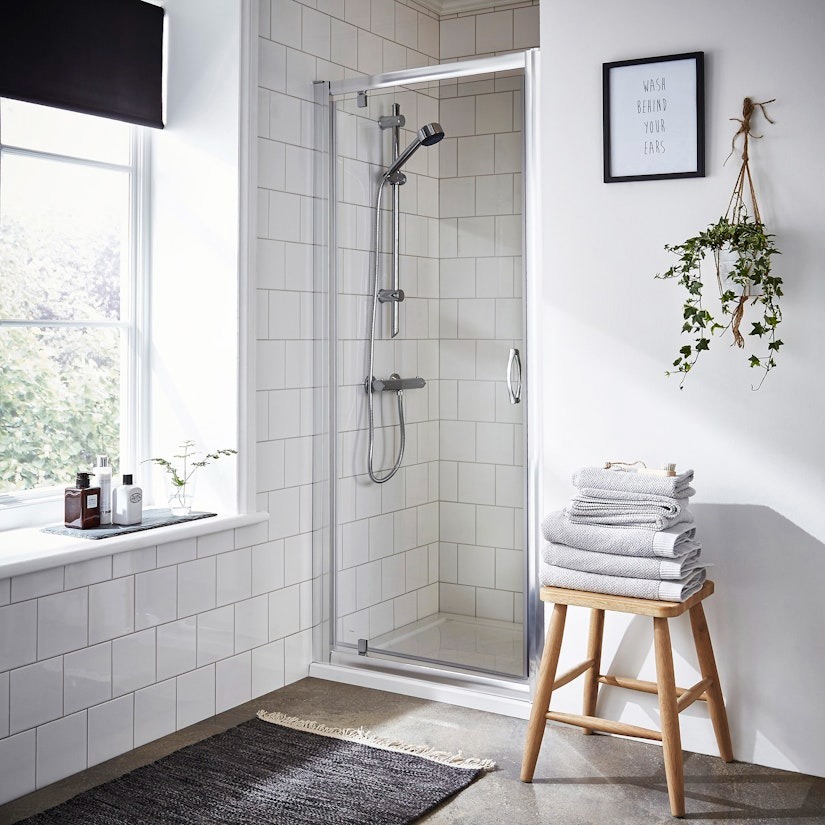
Pivot Door Enclosures
Pivot doors open on an in-center hinge to provide a wide, welcoming entry into your shower. These structures provide a strong, traditional appearance and are recognised for their longevity. Ideal for medium to large bathrooms, they often feature magnetic seals that help keep the water from leaking.
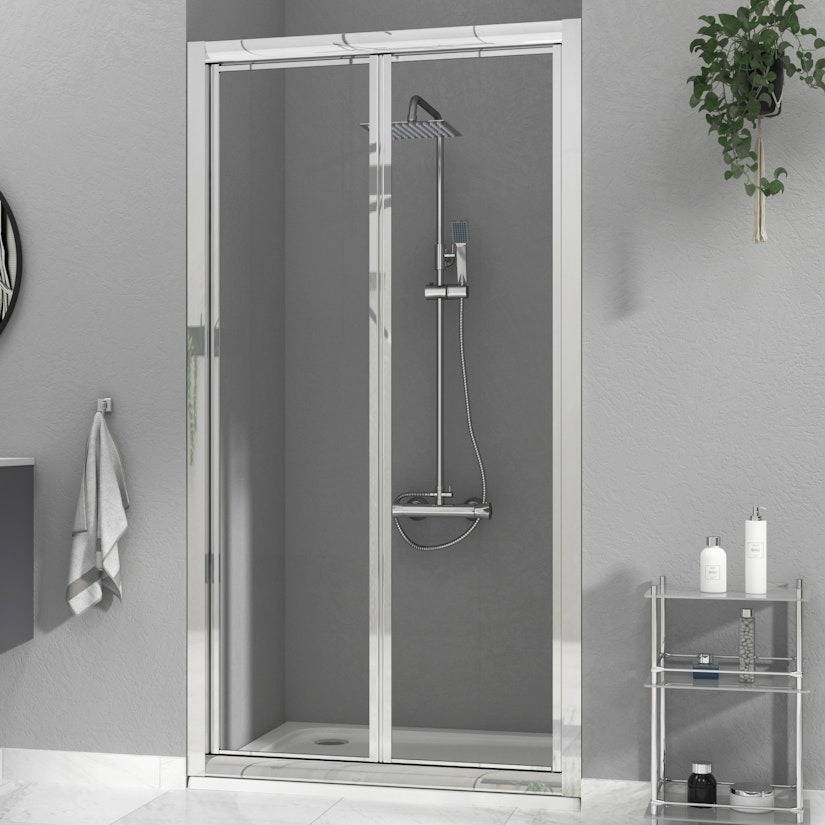
Bi-Fold Door Enclosures
Stylish yet practical, bi-fold enclosures are the absolute way to go for small bathrooms if you're tight on space or have an awkward area to work with. These become most efficient in compact spaces on a hinge that folds inwards. Although relatively small, they offer a full-width opening for simple entry and exit.
Essential Guidelines Before Installation
Now that we are deep into the installation process, it's time to set the stage. A few steps will ensure your shower enclosure fits perfectly and performs flawlessly. Here are some crucial steps to take before starting:
Check Every Component Carefully
First, unbox and inspect all components arriving for the shower enclosure. Inspect the glass panels, tray, handles, hinges and any included fittings. Be certain that nothing is chipped, cracked or missing. It’s much better to identify a defect now than halfway through installation. Check everything against the manufacturer’s checklist to confirm you won't forget any essential hardware. A quick inventory now will save you time and frustration down the line.
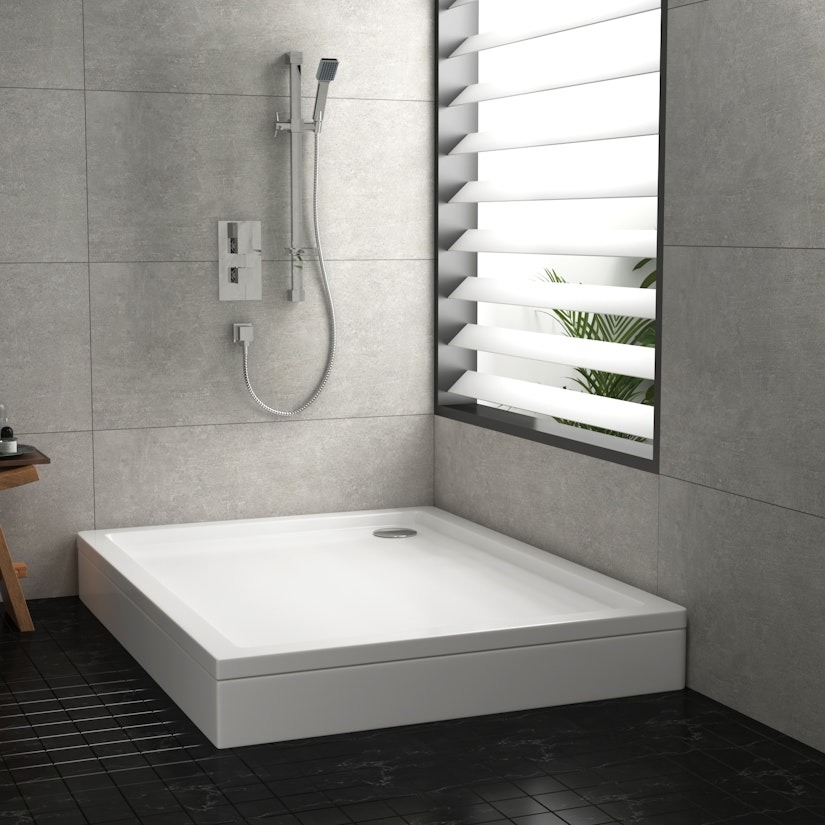
Level the Shower Tray
The tray is the basis of your enclosure — so it must be perfectly leveled to avoid future damage or inconveniences. Check several points across the tray surface with a spirit level. If you notice any instability, tweak it until it’s resting entirely horizontal. This step is vital in keeping your glass panels properly positioned and for drainage purposes. A poorly levelled tray can lead to standing water or annoying leaks.
Shut Off the Water Supply
Always ensure you turn off the water supply before starting any installation work. Otherwise, you might end up with surprise sprays and spills. If the water enters your home, track down the main shut-off valve (usually located in a basement or utility space) and turn it off. While you may not necessarily be working directly with plumbing, it’s best to take caution, especially when working near water lines. Put some towels on the floor around your work area too, to catch any unusual drips from the existing fixtures.
How to Install a Shower Enclosure: A Step-by-Step Guide
Once your components are inspected and the area is prepped, it’s time to install your shower and make it come alive. There are, however, two main phases for the actual install:
Phase 1: Installing Your Shower Tray (With or Without a Riser Kit)
Phase 2: Installing the Shower Enclosure
Phase 1: Installing the Shower Tray
The first step in what ends up being a long-lasting enclosure is a solid and even shower tray. If you put it on the floor or use a riser kit, make it perfect.
Tools & Materials You'll Need
For the installation of the shower tray, you will need the following:
-
Shower waste and trap
-
Telescoping legs and side panels (riser install only)
-
Spirit level
-
Jigsaw
-
Bucket
-
Cement and building sand (for mortar bed)
-
Marine ply or treated timber (for leveling uneven floor)
-
Self-leveling compound (optional)
-
Neutral cure silicone sealant, anti-bacterial
-
Shims or spacers (if needed)
-
Screwdriver or drill (for riser frame installation)
A. Installing the Shower Tray Without a Riser Kit
This technique involves using mortar or adhesive to set the tray directly on the floor, perfect for minimalist, low-profile installations. Here’s how you can install a shower tray without a riser:
Prepare the Area
Make sure the floor is clean, dry, and level. If the floors are uneven, lay marine plywood or apply a self-leveling compound to make a flat, stable surface.
Mark the Tray Position
Mark where the tray will go on the floor. Freeze a waste hole to cut and align with the existing plumbing.
Create the Waste Cut-Out
Cut out the marked waste area using a jigsaw on a timber floor. Also, make sure you leave space for the trap and plumbing connections.
Apply Mortar or Adhesive
For mortar bed (4:1 sand to cement mix), or strong tray adhesive. Apply it uniformly within the outlined space for strong adhesion.
Position and Level the Tray
Gently set the tray in the mortar bed. Check in all directions with a spirit level. If any fine-tuning is required, use shims under the base.
Connect the Waste System
Connect the waste trap and pipework beneath the tray as the mortar sets. Tighten all seals and do a small water test to ensure no spills.
Allow to Cure
Do not disturb the tray for at least 24 hours (or as specified in the product curing time) before installing the shower enclosure.
B. Installing a Riser Kit on the Shower Tray
A riser kit raises the tray, making plumbing much more accessible, useful for solid concrete floors or if pipework runs above the level of the flooring.
Assemble the Riser Kit
Assemble the kit following the manufacturer’s guide. These usually consist of adjustable legs, supporting brackets, and clip-on side panels.
Fit the Legs and Supports
Set the legs in place on the bottom of the tray. Distributing them correctly to balance the weight and adjust the height.
Position and Level the Tray
Put the tray in its position and ensure all 4 legs one by one with a spirit level until the tray does not vibrate.
Secure the Tray
Once level, tighten fittings on all legs and secure the brackets. Others may feature locking systems that use the base frame to secure it to the floor for stability.
Connect Plumbing and Waste
Guide the waste outlet into your plumbing. Put the trap in place with all washers and seal it in place. Check the connection by running water through the drain.
Attach the Side Panels
Slide or clip the side panels into position once the tray is secured and plumbing confirmed to hide the legs and achieve the clean finish.
Phase 2: Installing the Shower Enclosure
When your shower tray is fully set and cured, it’s time to install the enclosure. This step is the icing on the cake because it ensures everything is sealed, stable, and functional to your new bathroom system and gives that spa-like out-of-the-box finish.
Tools & Materials You'll Need
To correctly size your shower enclosure, ensure you have the following:
-
Electric drill
-
Screwdriver (manual and/or powered)
-
Silicone sealant gun
-
Spirit level
-
Pencil or marker
-
Tape measure
-
Rawl plugs (generally supplied with enclosure)
-
screw for fixing (often provided with enclosure)
-
Claw hammer (needed for plugs or tapping brackets in)
-
Sealant (mould resistant, neutral cure)
-
Chisels (wood) or hacksaw (if you need to adjust)
Step I: Install Vertical Wall Profiles (Brackets):
Place the vertical wall profiles (brackets) in the area where the enclosure is to be mounted. Use a spirit level to ensure they’re perfectly vertical, then use a pencil to mark the drill points.
Step II: Drill and Insert Wall Plugs
Drill a hole matching your wall type. Drill pilot holes and insert the rawl plugs, then screw the wall brackets in.
Step III: Assemble the Frame
Once the wall brackets are secured, construct the enclosure’s main frame as per the manufacturer’s instructions. Those can be anything from the upright profiles, the base tracks, corner joints.
(Note: A second person to hold the panels in place during this step will be very useful.)
Step IV: Install the Glass Panels
Install the fixed glass panels into the tray and profiles. Fasten them using the fixings supplied. If included, add sealing strips along edges.
Step V: Adapt the Sliding or Hinged Doors
Attach rollers (fixed at the top, spring-loaded on the bottom) for sliding doors, then clip the doors onto the tracks. Ensure smooth operation. Hinged doors are required to be aligned and controlled by the screws of the hinges.
Step VI: Attach Handles and Covers
Attach the handles to the glass doors. At this point, decorative covers will be added to the screws and brackets, hiding the fittings, protecting them from water exposure.
Step VII: Apply Door Seals
Install vertical and horizontal rubber or plastic door seals along the edges of the glass. These stop the water from seeping between panels and doors.
Step VIII: Corrected the Wall Profiles of the Enclosure
Using screws, drill through the vertical frame into the wall profile (generally 2–3mm from edge). Use caps that cover the screws neatly.
Step IX: Seal the Exterior Only
Apply a thin, continuous bead of silicone sealant along the outer edges only, where the frame meets the walls and tray. Do not seal the inside, so that water can drain.
Cure tip: Let the sealant cure entirely before using the shower (24 hours). Ensure the room is ventilated adequately at this time.
And now your enclosure is installed and sealed, meaning your shower is ready to use.
Professional Installation — When You Need It
Although DIY installation can save you money, professional installation might sometimes be worth it. If you are inexperienced or dealing with difficulties like crooked floors, uneven walls, or complex plumbing, a professional installer can manage those problems better.
They ensure they install it correctly, maintain its proper alignment, and even design custom-fit enclosures. Additionally, professionals offer warranties, which provide assurance and safeguard against future problems if you are time-crunched or not confident in the installation process. Hiring a pro guarantees a quality, trouble-free result.
Conclusion
If you tell the difference between installing a shower enclosure, it will look like an excellent task and with the proper steps and guidance, shower enclosure installation can be a rewarding DIY project. Proper design selection and installation are key to building the right enclosure. However, professional installation will save you time for tough cases like uneven floors and complex plumbing, and you won't have to worry about anything.
You can either handle this yourself or hire a professional—the choice is yours (but for your bathroom hygiene, we highly recommend calling a handyman). As long as your shower enclosure is well installed, it will ensure you enjoy improved comfort, style and function in your bathroom for years to come.
Explore our range of elegant shower enclosures & get your perfect match today!
Frequently Asked Questions
What’s the best way to install a shower enclosure in a rental apartment without damaging tiles?
Use adhesive strips or tension pole systems that don’t require drilling, if you don’t want to damage the tiles. Whenever you need to drill, shoot for grout lines, not tiles, whenever possible. This lets you remove and reattach the enclosure without leaving permanent marks or holes.
How do I prevent condensation buildup inside frameless glass enclosures?
To minimise condensation in frameless glass enclosures, you should maintain good bathroom ventilation by using an exhaust fan or opening a window. To reduce moisture buildup, you can also anti-fog the glass and wipe the panels after you use them.
Can I reuse an old shower enclosure frame with new glass panels?
You can reuse an old shower enclosure frame when replacing the glass panels. The frame must still be in excellent condition and fit the new panels. Be sure to replace any O-rings or other hard seals to be sure you have a tight fit and proper seal.
How to install a shower enclosure in a tiny bathroom with under 30 inches of space?
For smaller bathrooms, under 30 inches, you can opt for a quadrant or bi-fold door shower enclosure. The best part about these shower enclosures is that they are space-saving yet offer much room. So, sliding or outward-opening doors may not work well in such a small space, and the key is to choose a more user-friendly design.
What’s the safest way to install a shower enclosure in a home with elderly or disabled residents?
For older or disabled residents, opt for a low threshold, walk-in shower enclosure that removes barriers. Grab bars, non-slip flooring, and a sturdy shower seat can help make the space safe and accessible for people with limited mobility.
How do I integrate a shower enclosure with existing waterfall showerheads or ceiling-mounted systems?
For a shower enclosure fitted with a waterfall or ceiling-mounted showerhead, the enclosure should be high enough to fit the height of the overhead showerhead setup. The sealing of the enclosure should allow water to splash over it, allowing the proper water flow when the device is being used, etc.