Post Contents [hide]
- First of all: Don't Buy the Wrong Shower Parts
- Identifying Your Shower Head Holder Type
- Measuring Your Riser Rail (Crucial Step for Slider Shower Head Holder Brackets)
- Choosing the Right Material
- How To Replace the Riser Rail Slider Shower Head Holder Bracket
- Step-by-Step Instructions
- Fixing a wall-mounted parking bracket
- Troubleshooting and Post-Installation Tips
- Summing It Up!
- Frequent Questions About Shower Handset Holder
A loose or unsteady shower head can quickly turn a calming shower into an inconvenience. Over time, the shower head holder may become cracked, worn, or unable to secure the handset properly, leading to constant adjustments and discomfort. Fortunately, replacing a shower handset holder is a straightforward and efficient task—one that can be easily completed with minimal tools and effort, restoring both convenience and functionality to your bathroom.
In this blog, we will walk you through the entire process of shower head holder replacement, positioned and securing it again in just minutes.
First of all: Don't Buy the Wrong Shower Parts
When it comes to shower head holder type, the most common mistake is buying a replacement part of a shower head that does not fit. Before you head to your local plumbing merchant, you need to identify your setup.
Identifying Your Shower Head Holder Type
|
Type of Holder |
How It Looks |
Crucial Factor for Replacement |
|---|---|---|
|
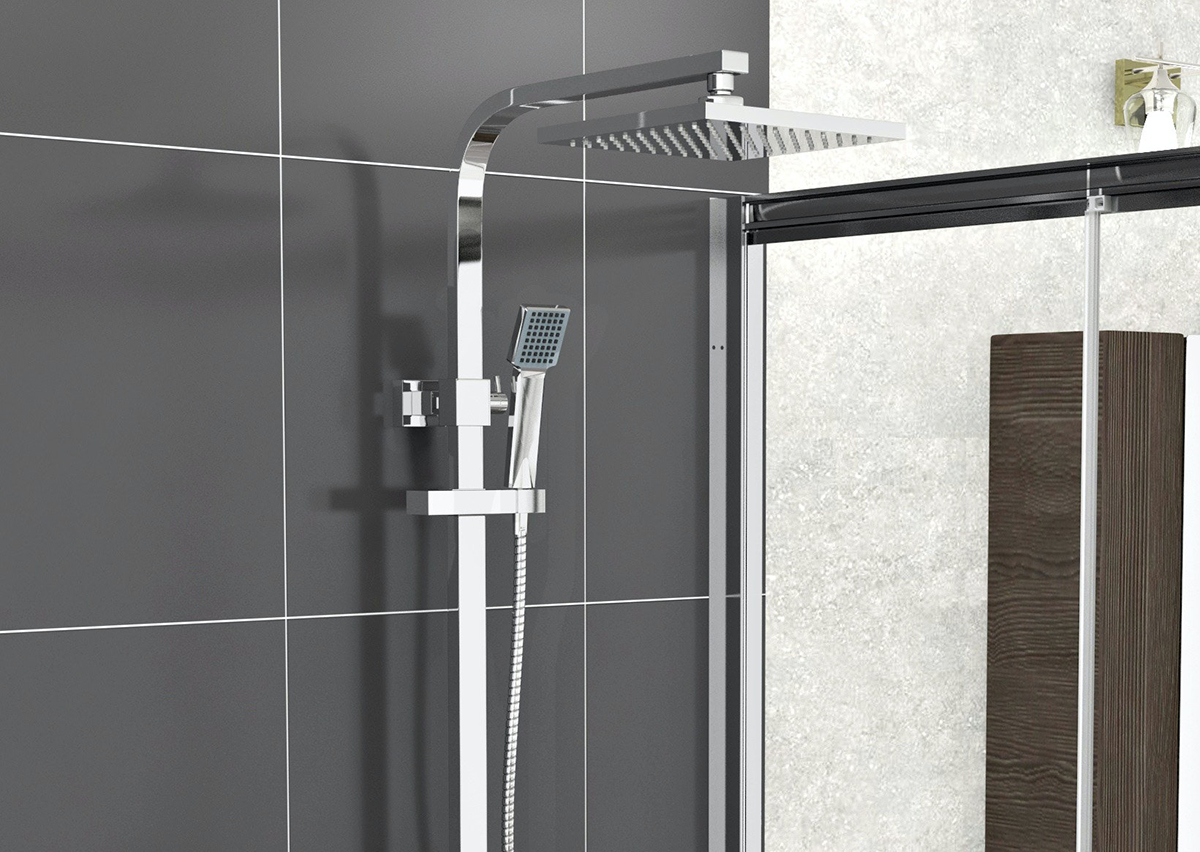
Riser Rail Slider (Slider Bracket) |
A bracket that clamps onto a vertical pole (the riser rail) and can be moved up and down. |
The Riser Rail Diameter. You must measure the width of the pole exactly (e.g., 19mm, 22mm, 25mm). |
|
Wall-Mounted Bracket (Parking Bracket) |
A small, fixed piece screwed or adhered directly to the wall, often near a bath mixer tap. |
The Fixing Method. Is it screw-fixed, or non-drill adhesive/suction? And does the new one cover the old marks? |
Measuring Your Riser Rail (Crucial Step for Slider Shower Head Holder Brackets)
If your shower includes a riser rail, precise measurement is essential. Use a tape measure or a pair of callipers. Remove the shower head by taking the handset out of the holder to access the rail. Once removed, you can now measure the width.
You should measure it with the diameter ( the width straight across) of the rail itself. Most of the rise rails in the UK have a standard size that can be 18mm, 19mm, 22mm, or 25mm.
*If you’re unsure, look for a Universal Shower Head Holder. Many reputable UK brands offer universal fittings designed to adjust and securely clamp onto rails between 18mm and 25mm, taking the guesswork out of the job.

Choosing the Right Material
Material is a crucial consideration for shower head holder replacement, as it affects both durability and cost. Generally, you will have chrome-plated ABS plastic material that is lightweight and affordable. It's a perfect choice if you are renting or tight on budget. However, one important thing to know here is less durability in the long term, especially against hard water and limescale.
Another option is chrome-plated brass or metal, which is a robust and professional choice. While heavier and more expensive, metal brackets last longer, hold their finish, and are significantly less likely to snap from repeated stress.
How To Replace the Riser Rail Slider Shower Head Holder Bracket
This is the most common replacement task. You do not need to remove the entire riser rail shower handset holder from the wall.
Tools and Preparation:
-
New Slider Shower Head Holder Bracket (correct size or universal fit)
-
Flathead/Slotted Screwdriver
-
Safety Cloth/Towel
Step-by-Step Instructions
Here is how to replace a showerhead holder.
First Step: Safeguard Your Bath/Tray
Before you start, it is important to clean and safeguard the bath/tray. You can place a towel or cloth over the shower tray or bathtub, covering the plug hole. This is your first line of defence against small parts (like screws or caps) disappearing down the drain or scratching your acrylic surface.
Second Step: Expose the Fixing Screw
The riser rail is held by brackets at the top and bottom, concealed by decorative caps. You only need to remove one bracket; the bottom one is usually easiest.
Simply use a small flathead screwdriver or your fingernail to gently prise the plastic concealing cap off the bottom bracket. This will expose the fixing screw (usually a Phillips or slotted head).
Third Step: Release the Rail
Now, by using your screwdriver, completely unscrew the fixing screw you just exposed. Keep the screw and the plastic cap safely on your prepared towel. The bottom of the rail is now loose. Gently lift the entire rail away from the wall fixture, pivoting it slightly on the top bracket.
Fourth Step: Swap the Slider
Slide the old, broken holder down and off the loose end of the rail. Dispose of the old part. Then take your new slider bracket. Check its orientation by dry-fitting the shower hose into it. You want the part of the shower head that holds the hose to face slightly up and away from the wall. Slide the new holder onto the rail from the bottom.
Fifth Step: Re-Secure the Rail
Align the rail back into the bottom wall bracket and reinsert the fixing screw and tighten it securely.
*If you are drilling into ceramic or porcelain tiles, be very careful not to over-tighten the screw, as this can put stress on the tile and cause it to crack. And clip the plastic concealing cap back over the screw head.
Sixth Step: Final Adjustment and Test
Clip your shower head into the new holder. Test the adjustment mechanism. It should now securely hold the head at any height and angle you choose.
Fixing a wall-mounted parking bracket
If your shower head holder is fixed directly to the wall without a rail, the process involves less disassembly but often requires more wall work.

A. Replacing a screw-fixed holder bracket.
-
First, remove the concealing caps. These hide the screws. Simply prise them off.
-
Remove all fixing screws to remove the old bracket by simply pulling it away from the wall.
-
Hold the new bracket up and check the alignment. In case the screw holes do not align, drill new ones. (move to step 5 if it is aligned perfectly).
-
Mark the new holes, drill carefully (using an appropriate masonry or tile bit), insert new wall plugs, and then fix the new bracket securely.
-
At the final step, seal the edges. Run a thin bead of bathroom silicone sealant around the perimeter of the bracket where it meets the tile. This prevents water from seeping behind the tile and damaging the wall.
B. Replacing an Adhesive or Suction Bracket (The No-Drill Method)
-
Start by removing the old fixture. For the suction type, you can simply pull it off, while in the case of the adhesive one, you may need a putty knife or a hair dryer to warm the pad to make peeling easier and quicker.
-
Next, clean the area of residues. You may use alcohol and wipe it down, and use a good degreaser to remove all the soap scums.
-
Once dry, the surface is now ready for a new bracket shower holder fitting. Simply follow the manufacturer's specific instructions. For suction cups, dampen slightly and press firmly, ensuring no air bubbles. For the adhesive, press and hold for the specified time, then wait at least 24 hours before hanging the shower head.
Troubleshooting and Post-Installation Tips
|
Problem |
Cause |
DIY Fix |
|---|---|---|
|
Water Leak at the Holder |
The bracket is part of a wall outlet, and the PTFE tape seal is missing or damaged. |
Turn off the water, unscrew the bracket, apply new PTFE tape (plumber’s tape) thickly around the thread, and screw the bracket back on. |
|
Shower Head Still Slips |
The new slider bracket is the wrong diameter, or the grip mechanism is not fully engaged. |
Re-measure the rail. If the size is correct, check that the locking lever or twist mechanism is fully tightened. If it’s a universal holder, ensure it's not upside down. |
|
Can't Remove the Rail Cap |
The cap is jammed with soap scum or limescale. |
Squirt some vinegar or limescale remover onto the joint and leave for 10 minutes. Use a very thin, non-metallic tool (like a plastic spatula or wooden coffee stirrer) to gently pry it open. |
Summing It Up!
Replacing your shower head holder is a quick win for your bathroom. By taking a few minutes to measure accurately and using the right tools replace the shower head holder ensuring your shower head stays exactly where you want it.
Frequent Questions About Shower Handset Holder
Are all shower head holders compatible with standard shower heads?
Not exactly. While the cone part that holds the head usually fits standard shower heads, you must ensure the holder fits the diameter of your riser rail (the vertical bar). UK riser rails are commonly 18mm, 22mm, or 25mm, so check this critical measurement before buying. A holder made for a 22mm rail will not fit a 25mm rail correctly.
What’s the difference between a riser rail shower hand set holder and a wall-mounted holder?
A riser rail holder slides up and down a vertical bar, allowing you to easily adjust the height for different users. A wall-mounted holder is a fixed bracket screwed directly into the wall, which is usually used for fixed shower heads or as a simple storage point. Wall-mounted types do not offer any height adjustment.
Are shower head holders for electric showers different?
The holder mechanism itself is typically not unique, but electric shower manufacturers often use specific, common diameter riser rails (like 22mm or 25mm). Therefore, it is advisable to check your shower’s brand or model specifications to ensure you buy the correct holder size for the rail. Using the wrong size will lead to a loose or un-secure fit.
What’s the benefit of a 360° adjustable shower head holder?
This feature allows you to fully rotate and swivel the shower head, giving you maximum flexibility to direct the water spray. It’s ideal for multi-user bathrooms as everyone can easily set the perfect height and angle, making the shower comfortable for both adults and children.
What’s the best cleaning solution for chrome or plastic holders?
The best solution is generally white vinegar mixed with water, or a mild soapy water, applied with a soft cloth. Avoid harsh chemical cleaners and abrasive scrubbing pads, as these will permanently damage the chrome finish or scratch the plastic. Regular, gentle wiping prevents stubborn limescale buildup.
Why does my holder’s grip wear out quickly?
The grip often wears out quickly due to cheap, soft plastic components or from constantly over-tightening the adjustment screw. To ensure longevity, look for holders with a metal tightening mechanism or better quality, durable ABS plastic.
Are no-drill shower head holders strong enough for daily use?
Yes, many modern no-drill options (like suction cups or adhesive shower head brackets) are surprisingly strong and reliable, often supporting weights well beyond the shower head itself. However, they work best on smooth, non-porous surfaces like glass or glossy tiles, not on grout lines or textured surfaces where the seal can fail.